Welcome to your AOZ Studio Lesson 6 – Neil Ives
(This lesson enhance the Lesson 3)
Remark from RayShell: Only all the text in the black code boxes in these lessons here is AOZ code, click in the upper right corner on copy to copy the code to the clipboard. Go to the AOZ Studio™ Editor to and paste the code inside your program. The //green text are comments you have to type or paste line by line into the editor window. The green Text after the // is only for your Information and to Understand the working and logic of your written AOZ Code. It is always a good idea and very important that you comment your code while you create it for your own Overview of the whole project, so you read your own Code very easy even Years later.
The most Important Thing for you is to feel free to play and try out the learned Basic Commands in own Test Projects. Change Values, Put your own Words and Ideas inside your program. If you make something wrong and push the Run Button the Run Command will stop and show where the Error is placed with a Line Number down in the Message Window. The other thing what can happen is that the Run Command starts your Application but you won’t see anything or you see not what you are expecting to see. Then you have to change your Code to be in the correct syntax and order to work with AOZ and to produce for you your desired Output.
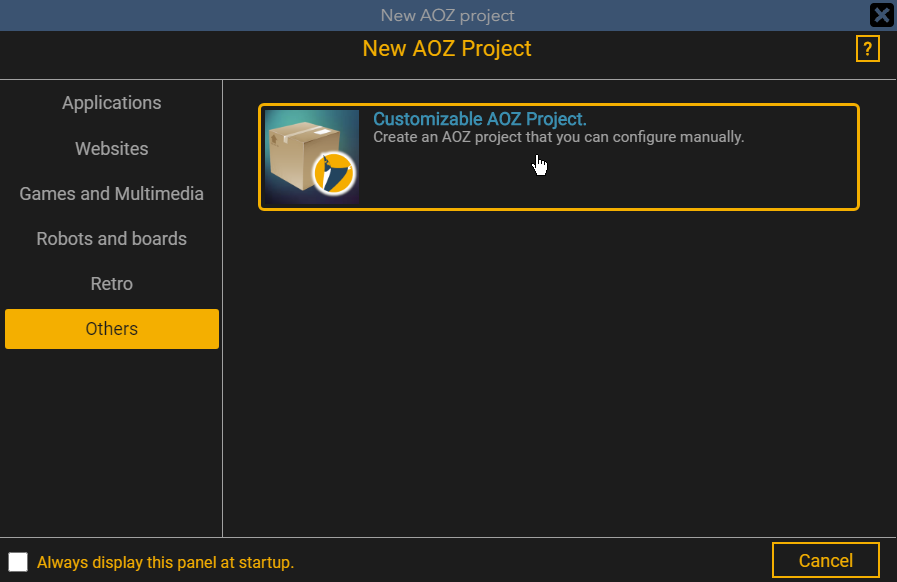
In the editor, click the paper icon at the top left to create a new project. Select Others in the left menu and choose Customizable Project, delete the entry “My Application” and give the new project the name Lesson 6.
You will then find your program in the folder Documents/My AOZ Applications/Lesson 6 where you will also find the subfolder ‘resources’ where images and sounds are stored.
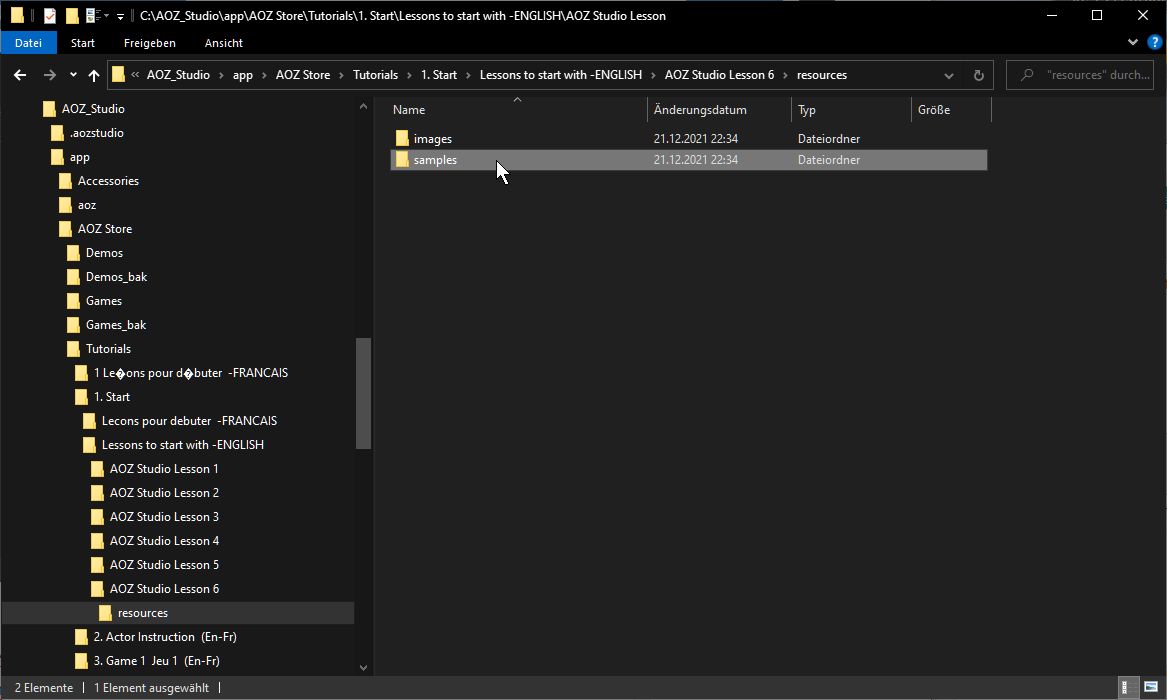
After you created your new project, the folders for images and sounds were also created in your project folder. In order to use images or samples in your program, you must make them available in your project folder for AOZ Studio. For this lesson we will copy the images and samples from the AOZ Studio Tutorials directory and paste them into your Project Lesson_6. Open the C:/AOZ Studio/app/AOZ Store/ Tutorials/1. Start/Lessons to start with – ENGLISH/AOZ Studio Lesson 6 directory via Windows Explorer and there the subfolder resources as shown in the picture and copy the folder samples.
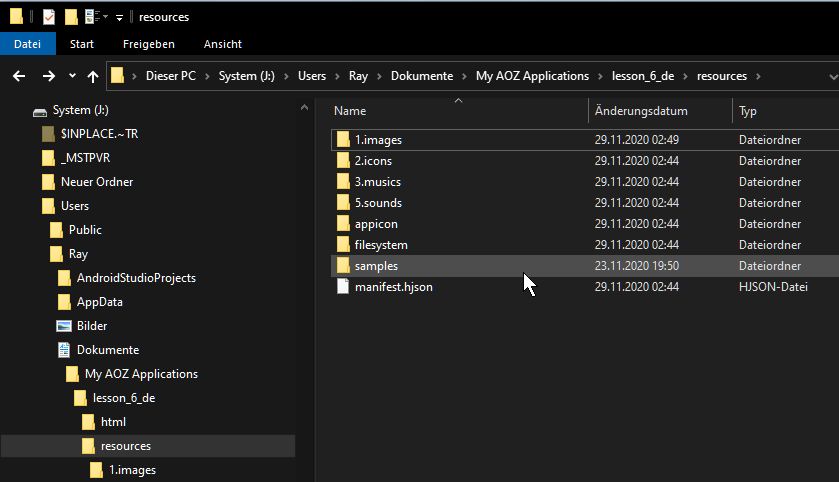
Then go to your new Project folder in the Documents/My AOZ Application folder and paste the copied Samples folder there.
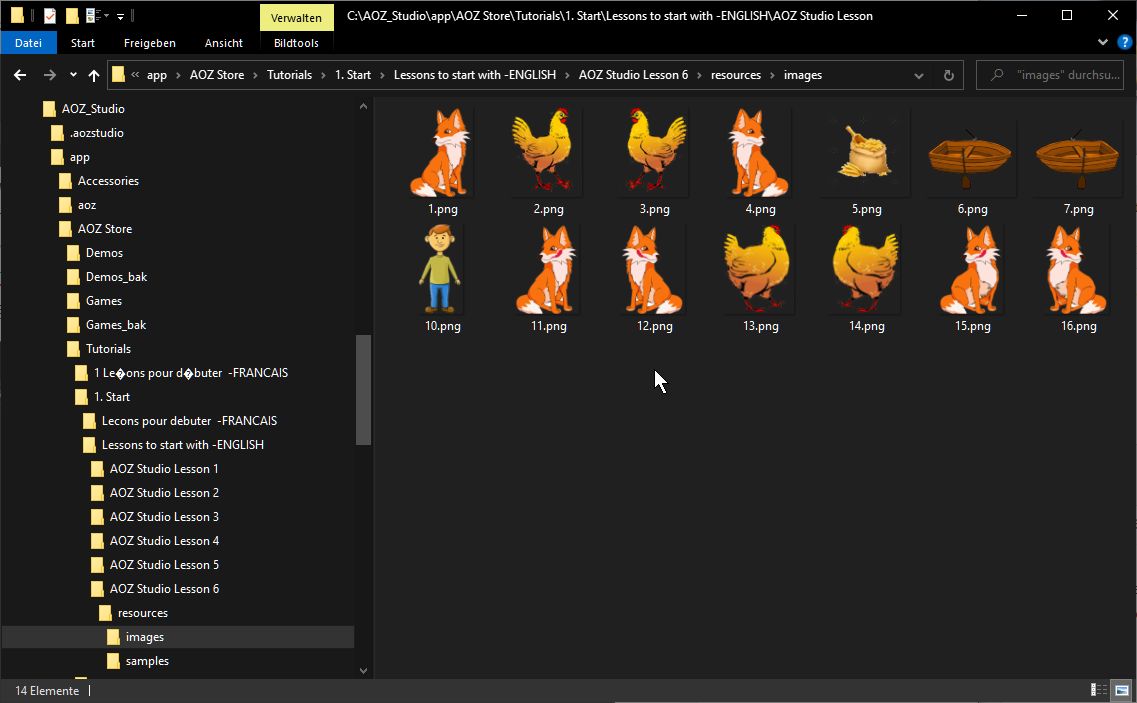
The images are stored in the images folder. Open the C:/AOZ_Studio/app/AOZ Store/ Tutorials/1. Start/Lessons to start with – ENGLISH/AOZ Studio Lesson 6 folder with the Windows Explorer and there the subfolder resources as shown on the picture and open the folder images. There select all images and copy them.
Then go to your new project under Documents/My AOZ Applications/Lesson 6 /resources and open the subfolder 1.images. Paste all copied images there now. Done !

All preparations are done now and you can start programming your first game. Have fun with it ????
So we are ready, let’s start!
/////////////////////////////////////////////////////////////
// This tutorial builds on what we learnt in other lessons //
/////////////////////////////////////////////////////////////
Here we will discuss and use:
Recap on Procedures
Adding string segments together, (appending)
Sprites
Graphic Text
While/Wend loops
Inkey$
Boolean variables
Recap on If/Else/Endif
Sound samples
////////////////////////////
// Setting up the program//
////////////////////////////
					#splashScreen:False     //Try setting this to 'True' to see the effect
#fullScreen:true
#googleFont:"acme"    //Select the graphic font to use. See note later
Curs Off        //Screen cursor is not needed
////////////////////////////////
// Setting up string segments //
////////////////////////////////
					ST9$="What should he move? "
ST10$="(M)an "
ST11$="(F)ox "
ST12$="(C)hicken "
ST13$="(S)ack of corn"
All$=ST9$+ST10$+ST11$+ST12$+ST13$'Notice how strings can be added together, (appended).
When All$ is printed it will look like this: “What should he move? (M)an (F)ox (C)hicken (S)ack of corn”.
During the game various partial strings will be added together to show the different choices available to the player.
NOTE: Don’t forget to consider adding a space at the end of a string segment to format the completed string correctly
////////////
// Global //
////////////
As discussed before, the word ‘Global’ allows these variables to be seen in all parts of the program.
Global All$,ST9$,ST10$,ST11$,ST12$,ST13$,STOPME
//////////////////////
// Boolean Variable //
//////////////////////
STOPME is being used as a boolean variable. Boolean values are like a light switch, they can only be in one of two states, eg., ‘True/False’, or ‘0/1’, or ‘On/Off’
We have used the boolean method to halt the program.
Check out the note following STOPME in the main program loop.
////////////////////////
// Graphic Text Fonts //
////////////////////////
Here we introduce Graphic Text Fonts:
In previous lessons we’ve been using the default text fonts to Print to the screen.
These are used again in this game to show messages at the top of the screen.
However, this time, for the introduction screen and the user feedback texts we have used the more visually interesting graphical Google Font called “Acme”
Graphical fonts can be positioned anywhere on screen by using graphical coordinates rather than text columns and lines, eg., Text 40,170
A Graphical font colour is set by ‘Ink’; eg., Ink 1
Set Font tells the program which font to use and what size, eg., Set Font “acme”,55
Strings can be used instead of actual quotes, eg., Text 40,170,ST9$ would work.
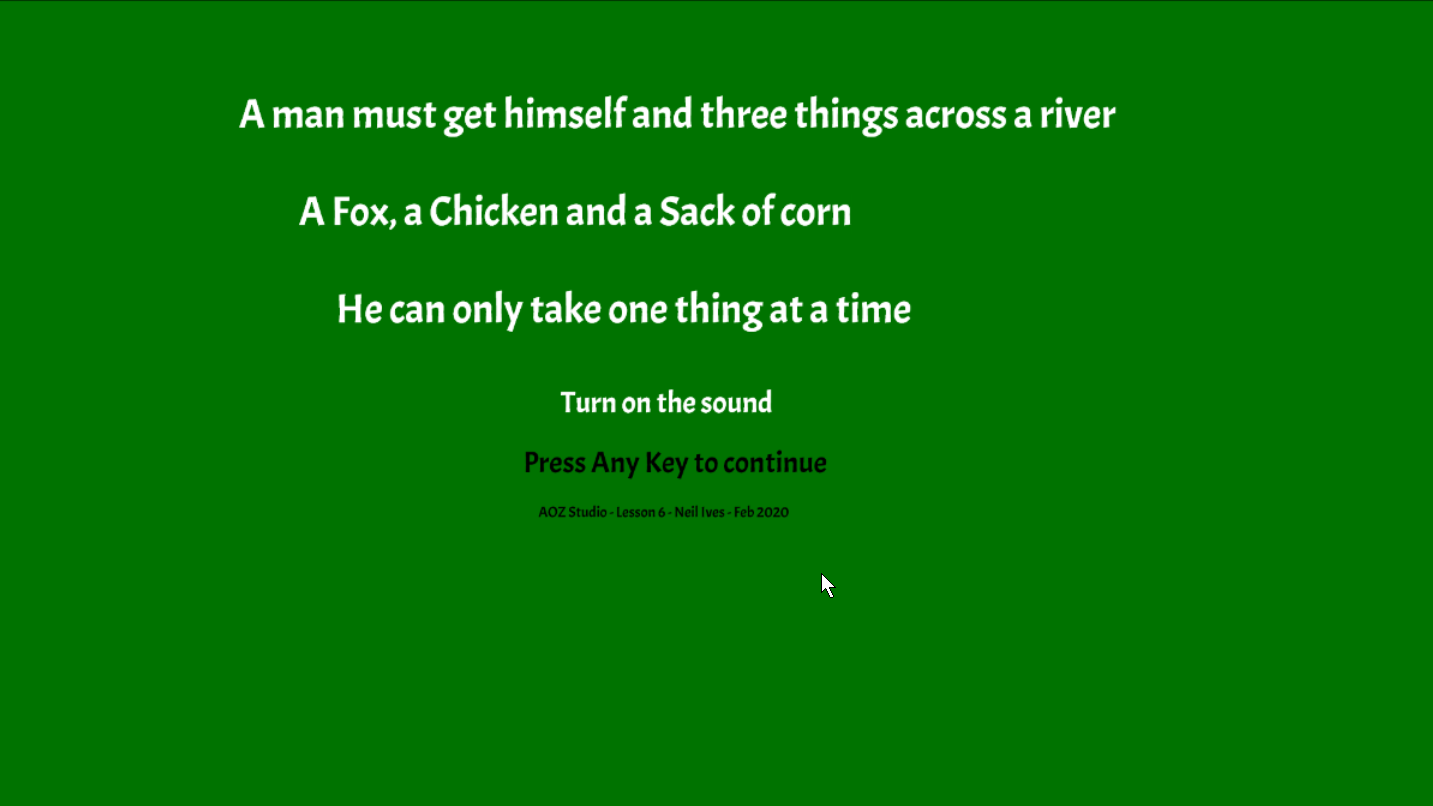
As the title message is only used at the start of the program we have used
actual text contained between quotation marks, eg.,Text 40,170,”A man must get himself and three things across a river”
					CLS 14   //Clear screen to colour 11, (Green)
//Set font colour, name and size
Ink 1,14: Set Font "acme",55  //Ink Textcolour,Backgroundcolour: choose a font and size
Notice how the text is positioned using graphical coordinates
					Text 320,170,"A man must get himself and three things across a river"
Text 400,300,"A Fox, a Chicken and a Sack of corn"
Text 450,430,"He can only take one thing at a time"
Notice the change of font colour and size
					Ink 1:Set Font "acme",40     //smaller
Text 750,550,"Turn on the sound"
Ink 0      //Change font colour
Text 700,630,"Press Any Key to continue"
Change size
					Ink 0:Set Font "acme",20      //smaller
Text 700,690,"AOZ Studio - Lesson 6 - Neil Ives - Feb 2020"
Wait Key     //Obvious!
////////////////////////////
// Set up the game screen //
////////////////////////////
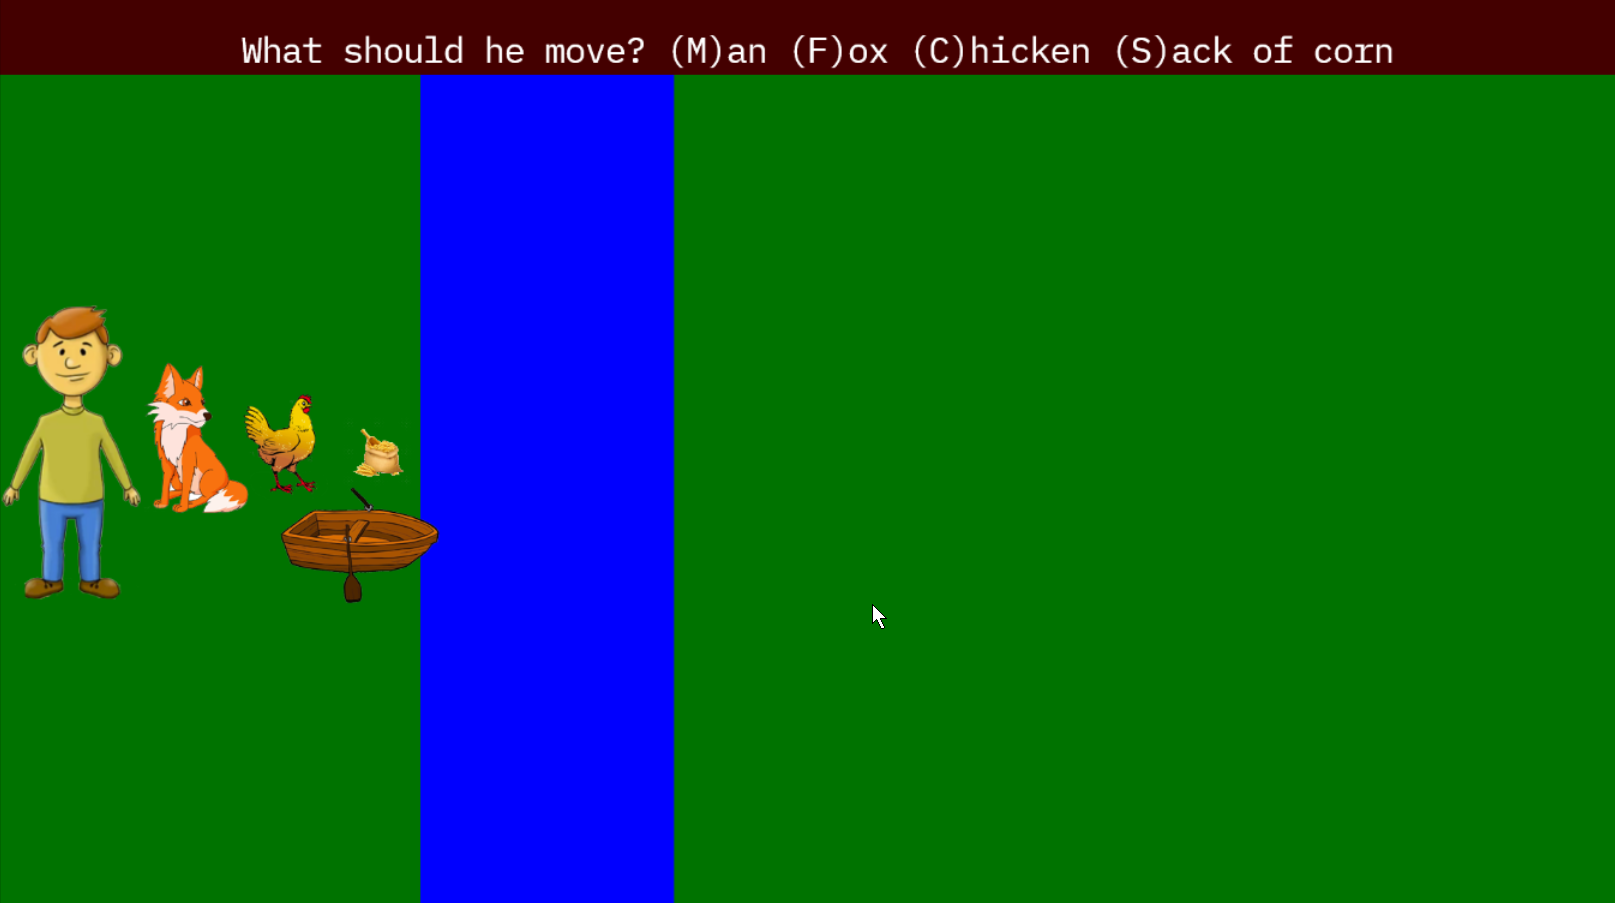
					CLS 14  //Clear screen, (to green)
Ink 20:Bar 500,0 To 800,1080    //Draw the river using colour blue and Bar x1,y1 to x2,y2
Ink 10: Bar 0,0 to 1920,90    //Create a full width message area at the top of the screen
Locate ,1:Paper 10:Pen 1:Centre All$   //This is using simple text fonts.
See above how All$ was made up of short strings
/////////////
// Sprites //
/////////////
Sprites are graphic objects that can be moved on screen and
have their image changed; for instance, in this game the fox,
the chicken and the boat show a reversed image on the other
side of the river.
Also, keep an eye out for other image changes!
Place the Sprites in the starting positions using graphical coordinates. The first Sprite is an image of a small boat
Sprite 1,330,560,6
The figures following the word Sprite, are: Sprite (number),(horizontal position),(vertical position),(image number). In this game the images are in .png format, numbered 1 to 16.
					Sprite 2,0,365,10    //Man
Sprite 3,400,490,5   //Sack of corn
Sprite 4,170,430,4   //Fox
Sprite 5,290,470,2   //Chicken
////////////////////
// The Game logic //
////////////////////
In the previous version of this puzzle game we used the horizontal positions of
printed strings to decide if a bad move was made, or the player had won.
This program uses the horizontal positions of the Sprites to do the same thing.
////////////////
// While Wend //
////////////////
This program has a While/Wend inside the main Do/Loop
While Choice$=””
Choice$=Inkey$
Wend
The loop above says: While Choice$=”” (=”” means an empty string), keep looping back at While End, (shortened to Wend)
////////////
// Inkey$ //
////////////
Inkey$ reads characters entered on keyboard
When Inkey$ gets a value from the keyboard it is passed to String variable Choice$, as Choice$ now has a value
the focus moves out of the While/Wend loop.
Unlike ‘Input’ the While/Wend and Inkey$ combination does not require the ‘Enter’ key to be pressed after making a choice so gives a more immediate response for the player of the game.
////////////////////////
// Main Program loops //
////////////////////////
					Choice$=""
Do
If STOPME=TRUE then Goto MARK   //This is neccessary to allow the program to be replayed
While Choice$=""   //This is an other form of loop, looking for a key pressed on the keyboard
Choice$=Inkey$
Wend   //send the value the user selected to the procedure PLACE_SPRITES
PLACE_SPRITES[Choice$]
Choice$=""   //Empty the string variable 'Choice$' ready for the next While/Wend loop
MARK:
loop
/////////////////////
// Procedure recap //
/////////////////////
In a previous lesson you saw how Procedures can be used as modular building blocks, each containing their own computer code.
In this game there are three procedures: PLACE_SPRITES, CHECK_IT and END_MESSAGES
Here is a description of each procedure:
/////////////////////////////
// Procedure PLACE_SPRITES //
/////////////////////////////
Takes the users input, (from Inkey$ in the main loops), converts it to upper case, because we cannot tell if the user has entered
capitals or lower case.
The procedure uses an ‘If/Else/End If’ structure to first check if Sprite 2, (the one with the image of the man) is located on the left
side, (position 0). It then moves one of the items selected by the letters, ‘M’,’F’,’C’,’S’ across the river.
If the man is not on the left he must be on the right side of the river so the ‘Else’ statement captures the alternative position.
(The Sprite with the boat image always moves with the man.)
Text positions in each section are stored in TX so that feedback is shown to the player when they select a letter, “C, “F”, etc., they see Chicken”, “Fox” etc.
Before the feedback text is displayed that area of screen is cleared using a defined area of CLS using the background colour.
Finally, the procedure CHECK_IT is called.
////////////////////////
// Procedure CHECK_IT //
////////////////////////
This proc does two things; it changes the selection texts at the top of the screen, (see earlier note about setting up text fragments)
This means the user only sees relevant selections. If Fox is not on the same side as the man, he cannot select it.
Next CHECK_IT looks for situations that mean the game has ended.
It may be that the player has got every item across the river and they have won the game, or it may mean that the fox has eaten the chicken etc.
At the end of that Proc, END_MESSAGES is sent a numeric value.
////////////////////////////
// Procedure END_MESSAGES //
////////////////////////////
This proc deals with selecting and formatting one of six possible messages to be shown at the end of the game.
This proc has some added drama with samples and image changes
//////////////
// Sam Play //
//////////////
Sam Play is used in Proc END_MESSAGES. Sam Play simply plays a sound sample.
The samples used in this game are .wav files, named ‘1.wav’, ‘2.wav’ and ‘3.wav’
The sample folder is located in the application folder, ‘resources’
Check out the end messages to discover how samples and wait periods are used for dramatic effect.
Procedure PLACE_SPRITES[C$]
Place the Sprites at the predefined, dependant on the user input Only the allowed characters (M, F, C, S) will be acted upon
					C$ = Upper$(C$)'Input capitalised, as before //Man at left positions
If X Sprite (2)=0   //Sprite 2 is the man
If C$="M"
Sprite 1,770,560,7   //Boat, (always moves with man)
Sprite 2,1110,365,10    //Man
End if
If C$="F"
Sprite 1,770,560,7    //Boat
Sprite 2,1110,365,10   //Man
Sprite 4,990,430,1        //Fox
End If
If C$="C"
Sprite 1,770,560,7   //Boat
Sprite 2,1110,365,10   //Man
Sprite 5,900,470,3    //Chicken
End If
If C$="S"
Sprite 1,770,560,7   //Boat
Sprite 2,1110,365,10   //Man
Sprite 3,800,490,5    //Sack of corn
End If
TX=900  //Feedback text position, (see later)
Else   //Man not at left side, hence using Else
If C$="M"
Sprite 1,330,560,6     //Boat
Sprite 2,0,365,10    //Man
End if
If C$="F"
Sprite 1,330,560,6     //Boat
Sprite 2,0,365,10   //Man
Sprite 4,170,430,4   //Fox
End If
If C$="C"
Sprite 1,330,560,6    //Boat
Sprite 2,0,365,10    //Man
Sprite 5,290,470,2   //Chicken
End If
If C$="S"
Sprite 1,330,560,6   //Boat
Sprite 2,0,365,10    //Man
Sprite 3,400,490,5   //Sack of corn
End If
TX=220    //Feedback text position
End If      //Print Feedback text at positions defined by TX
Ink 10: Bar 0,0 to 1980,90  //Clear text area
Ink 1:Set Font "acme",40
If C$="C" then Text TX,150,"Chicken"
If C$="F" then Text TX,150,"Fox"
If C$="S" then Text TX,150,"Sack of Corn"
If C$="M" then Text TX,150,"Man"
CHECK_IT   //Go to the procedure that checks for bad decisions
End proc
Procedure CHECK_IT
//————- Update Top bar choices ————-
					Ink 10: Bar 0,0 to 1300,90   // Clear previous message
 Locate 0,1:Paper 10:Pen 1  //Set up printing colours
Use Sprite horizontal positions, derived from ‘X Sprite() to append strings to be used, ST10$+ST11$+ST12$+ST13$ etc.
This is all of the possible choices that do not trigger an ‘End of game’ message.
					//All on left side
If X Sprite(2) = 0 and X Sprite(3) = 400 and X Sprite(4) = 170 and X Sprite(5) = 290  Then Centre ST10$+ST11$+ST12$+ST13$
//Man, Fox, Corn on left side
If X Sprite(2) = 0 and X Sprite(3) = 400 and X Sprite(4) = 170  and X Sprite(5) = 900 then Centre ST10$+ST11$+ST13$
//Man, Fox, Chicken on left side
If X Sprite(2) = 0 and X Sprite(3) = 800 and X Sprite(4) = 170 and X Sprite(5) = 290 then Centre ST10$+ST11$+ST12$
//Man, Chicken, Corn on left side
If X Sprite(2) = 0 and X Sprite(3) = 400 and X Sprite(4) = 990 and X Sprite(5) = 290 then Centre ST10$+ST12$+ST13$
//Man and Chicken on left side
If X Sprite(2) = 0 and X Sprite(3) = 800 and X Sprite(4) = 990 and X Sprite(5) = 290 Then  Centre ST10$+ST12$
//Man, Fox, corn on right side
If X Sprite(2) = 1110 and X Sprite(3) = 800 and X Sprite(4) = 990 and X Sprite(5) = 290 then Centre ST10$+ST11$+ST13$
//Man, Fox, chicken on right side
If X Sprite(2) = 1110 and X Sprite(3) = 400 and X Sprite(4) = 990 and X Sprite(5) = 900 then Centre ST10$+ST11$+ST12$
//Man, Chicken, Corn on right side
If X Sprite(2) = 1110 and X Sprite(3) = 800 and X Sprite(4) = 170 and X Sprite(5) = 990 Then  Centre ST10$+ST12$+ST13$
//Man and Chicken on right side
If X Sprite(2) = 1110 and X Sprite(3) = 400 and X Sprite(4) = 170 and X Sprite(5) = 900 Then Centre ST10$+ST12$
// Check for ‘End of Game’ using the Sprite horizontal positions, derived from ‘X Sprite()’
Send a message number to Proc END_MESSAGES
					//Fox, Chicken and Corn are alone on left side
If X Sprite(4) = 170 and X Sprite(5) = 290 and X Sprite(3) = 400 and x Sprite(2) = 1110  Then END_MESSAGES[1]
//Fox and Chicken are alone on left side
If X Sprite(4) = 170 and X Sprite(5) = 290 and X Sprite(2) = 1110 then END_MESSAGES[2]
//Chicken and Corn are alone on left side
If X Sprite(5) = 290 and X Sprite(3) = 400 and X Sprite(2) = 1110 Then  END_MESSAGES[3]
//Fox and Chicken are alone on right side
If X Sprite(4) = 990 and X Sprite(5) = 900 and X Sprite(2) = 0 then END_MESSAGES[4]
//Chicken and Corn are alone on right side
If X Sprite(5)=900 and X Sprite(3) = 800 and X Sprite(2) = 0 Then: END_MESSAGES[5]
 //Fox, Chicken, Corn and Man are all on right side
If X Sprite(4) = 990 and X Sprite(5) = 900 and X Sprite(3) = 800 and X Sprite(2)= 1110  Then END_MESSAGES[6]
End Proc
Procedure END_MESSAGES[MESSAGE]
//Show appropriate 'End Of Game' messages
If MESSAGE = 1
Ink 10: Bar 0,0 to 1300,90
Sam Play 2    //Play sound sample of chicken
Locate ,1:Paper 10:Pen 1:Centre "The Chicken ate the corn..."
Wait 0.5    //Pause half second for dramatic effect!
//Sprite Off 3 //Remove corn [Sprite off does not work in this Beta  version of AOZ]
Sprite 3,-100,490,5    //Remove corn from visible screen
Sprite 5,,,13   //Image changed to fat chicken
Wait 2    //Pause for dramatic effect!
  //Sprite Off 5//Remove chicken[Sprite off does not work in this Beta version of AOZ]
Sprite 5,-100,470,2  //Remove chicken from visible screen
Sprite 4,,,16  //Image changed to Fat fox
Wait 0.5  //Pause again
Sam Play 3  //Play sound sample of burp
Bar 0,0 to 1300,90:Locate ,1:Centre "...then the Fox ate the  Chicken!":Wait 3
End if
If MESSAGE = 2 Then Sam Play 3: Sprite 5,-100,470,2:Sprite 4,,,16:Ink 10: Bar 0,0 to 1300,90:Locate ,1:Paper 10:Pen 1:Centre "The Fox ate the chicken!":Wait 2
If MESSAGE = 3 Then Sam Play 2: Sprite 3,-100,490,5:Sprite 5,,,13:Ink 10: Bar 0,0 to 1300,90:Locate ,1:Paper 10:Pen 1:Centre "The Chicken ate the corn!":Sam Play 2: Wait 2
If MESSAGE = 4 Then Sam Play 3: Sprite 5,-100,470,2:Sprite 4,,,15:Ink 10: Bar 0,0 to 1300,90:Locate ,1:Paper 10:Pen 1:Centre "The Fox ate the chicken!":Wait 2
If MESSAGE = 5 Then Sam Play 2: Sprite 3,-100,490,5:Sprite 5,,,14:Ink 10: Bar 0,0 to 1300,90:Locate ,1:Paper 10:Pen 1:Centre "The Chicken ate the corn!":Sam Play 2: Wait 2
CLS 0
If MESSAGE = 6 then Sam Play 1:Ink 10: Bar 0,0 to 1920,90:Locate ,1:Paper 10:Pen 1:Centre "Congratulations, you did it!": Wait 1  //Sample 1 is crowd cheering
Wait 0.5
Locate ,18:Paper 0:Pen 1: Centre "Start the game new to go again"
Wait 1
STOPME=True   //Logical flag used to halt program in main Do/loop
End proc
**Click on the “Run in Browser” button or F1 to start the program in the browser or on “Run in AOZ Viewer” (F2) to start it in the editor
Try to code own things with all the commands you learned here, change values and play with them.
A click on the ? in the upper right corner of the editor opens the integrated manual of AOZ Studio. There you will find more information, as well as a user manual in English and French and an overview of the commands of AOZ Studio in English. Here the commands are described with all possible options.
Thanks for programming with RayShell.de and tell your friends about it.
Updated 23.07.2023
Tested with AOZ Studio™ version 1.0 Update 44 on 23.07.2023